

If you have read my previous post How to create multiple streams of income you know that a foundation to make passive money online is to have a blog where you can write about things you are really passionate about. Self-hosted WordPress is one of the best platforms to start blogging and also making money. Now, we are extending the series here with Bluehost WordPress installation guide.
I’ve also had a lot of people who are not that technical request for me to show them in a tutorial how to create a blog and set it up. I decided to put together a blog post, showing you step-by-step guide on how you can create a blog and set it up in a few minutes using WordPress. I will also show you how you can get a free domain name in the process – check it out below.
I use Bluehost for all of my websites and I also recommend it to all of my clients. Bluehost is a web hosting service which you need in order for you to host your WordPress blog on. They also give you a free domain name (normally $12/year or more) when you use them and automatically link up the name servers with their hosting. Bluehost is extremely user friendly and you can simply install it in a click of a few buttons. You really don’t need any technical knowledge and this guide will provide everything you need to successfully set up your blog. WordPress is the platform that I use for this blog, and it’s much better to self-host your own blog with your own domain name, if you’re even a bit serious about blogging. See the instructions below on how to create a blog and set it up in minutes.

Bluehost offers a monthly plan, which means that you can cancel with them at any time and they will refund you any amount of hosting that you didn’t use. You can also sign-up for as low as $4.95/month, which is an awesome deal. For any WordPress web host, it’s important to meet certain technical requirement and Bluehost fits perfectly into WordPress hosting needs. So, if you are still wondering if Bluehost is worth for WordPress or not, my suggestion: Go for it!
Please note: I am a Bluehost affiliate, which means that they pay me a commission every time I refer someone to use their service. But this didn’t influence my recommendation in any way, because all hosting services have similar programs. I recommend because I honestly believe they offer the best hosting available especially if you consider the price tag of the service they provide.
Next, you’ll be asked to add the domain name you desire. The domain name is going to be the URL for your future blog that people will be able to visit. I recommend setting up a “.com” name over a “.net” or anything else, as “.com” is the most popular. You need to make sure your domain name is available and not taken, so I’d warmly recommend to come up with a few ideas before you start this process as it may take a while before you find the one that you like and is also available.
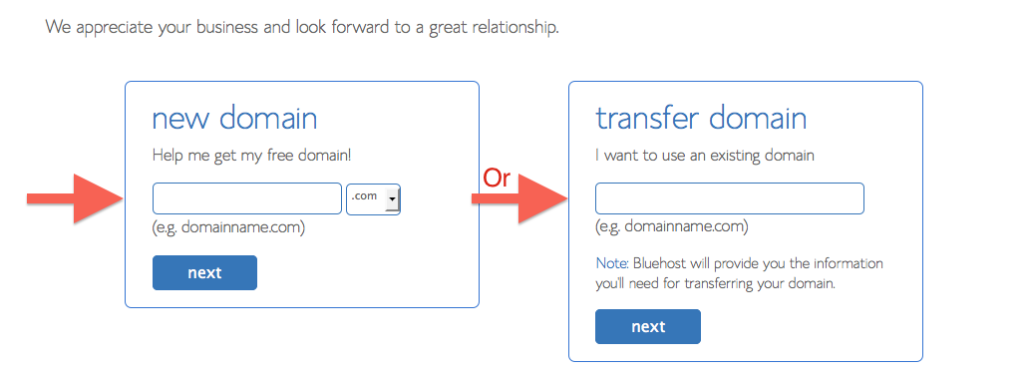
Alternatively, if you already have a domain and you have it set up with or another domain name registrar, then you can add it to the section.
Once you’ve selected your domain name and it’s available, you will need to fill out your personal information and select your hosting package. I recommend the 12 month hosting package, which means the price ends up being $6.95 per month. You can get it even as low as $4.95 per month with Bluehost if you commit to 36 months.
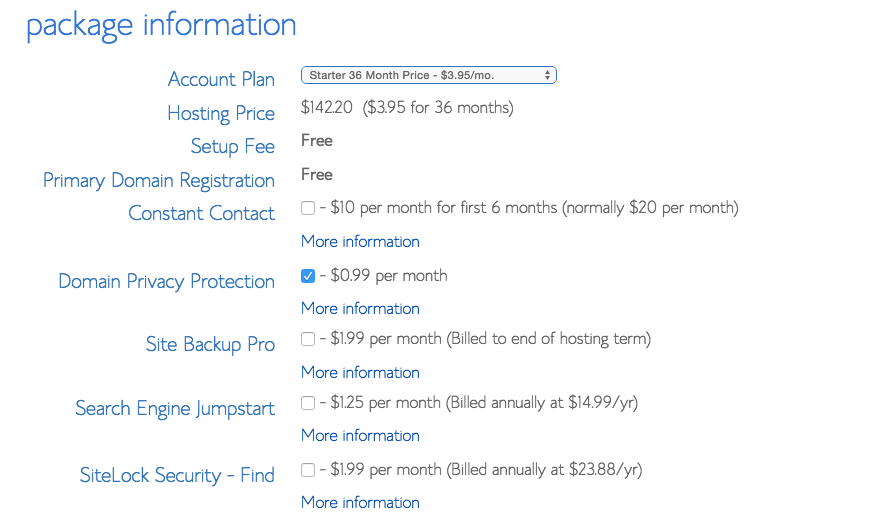
I would generally recommend you to ignore all of the extras that they will attempt to sell you. The only thing I’d really consider would be the Domain Whois Privacy, which means that people can’t find out your personal information when they look up your domain name. But none of the extra stuff is necessary moving forward.
Finally, you are almost done and just need to enter your payment information and then click on “Next” to move forward in setting up your own WordPress blog.
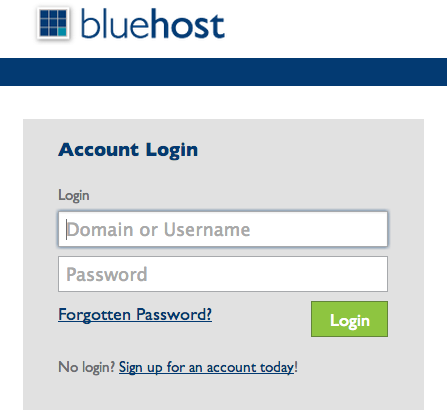
Once you’ve signed up successfully, you’ll be redirected to a page where you will have to set up a password to access Bluehost. Click on “Create your password” and put in your desired password. After that step, you’ll be taken to the login page where you can enter your domain or username, along with your password to access the control panel.
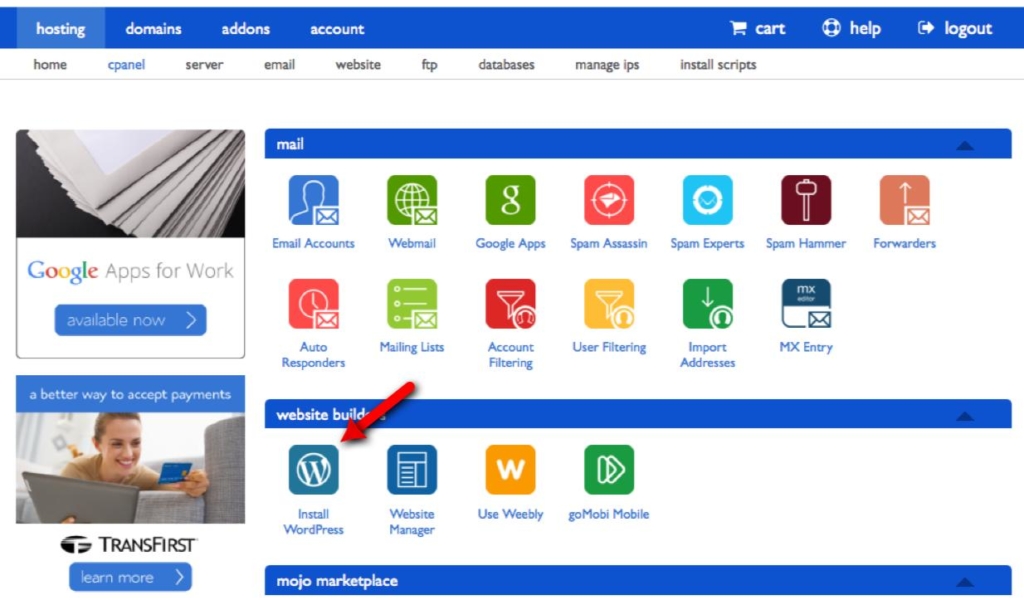
Once you’re successfully logged in, click on the “Website” tab in the control panel. You should now see a list of platforms that you can use and install for free. I would really recommend you to use WordPress, which is what I personally use for all of my blogs and websites. WordPress is most widely used blog platforms and you don’t need any technical knowledge to use it. Simply click on “Use WordPress” so that we can begin the installation.
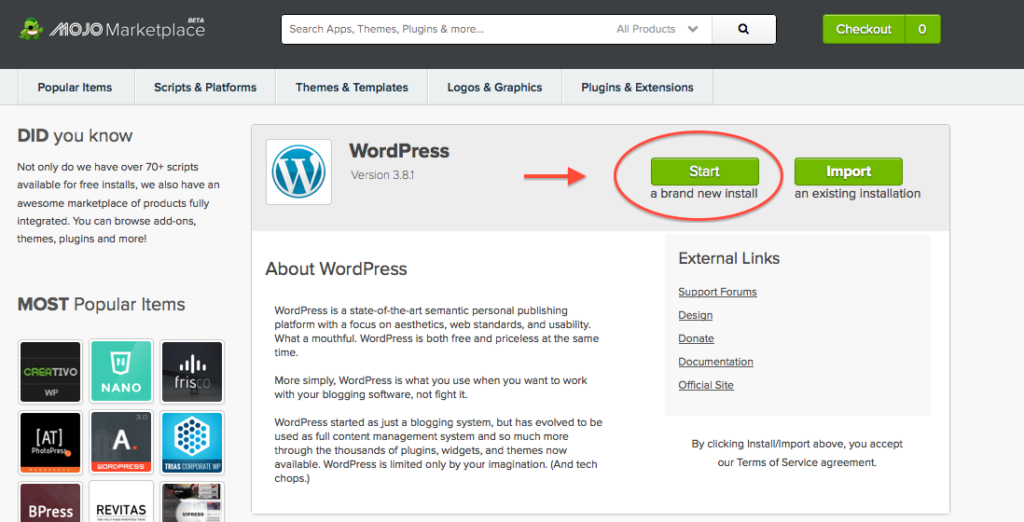
You will be then guided through simple instructions to installing your WordPress blog using the MOJO Marketplace.
Click on “Start” once you’ve been redirected to the installation page for WordPress.
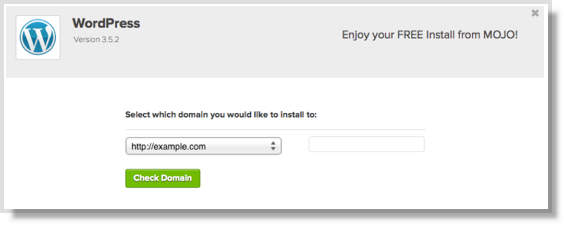
After that process, you’ll be asked to select which domain you’d like to install WordPress to. You can leave it blank if you want to install WordPress on the root domain.
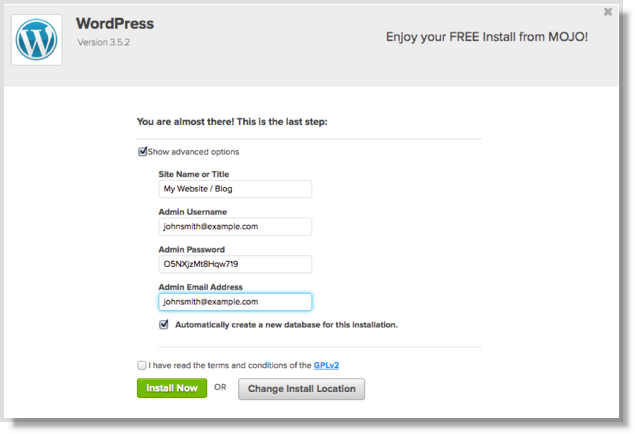
In the final step, you’ll be asked to enter information about your blog, such as the your Site Name, Username, Password, and E-Mail Address for WordPress. Fill out the required information and click on.
Bravo you’ve finished the installation! The final step now for you is to login to your WordPress dashboard on your domain name, and start blogging about the things you want to blog about.
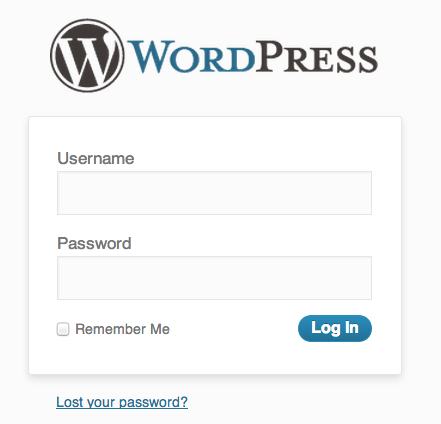
To access the login page for your new blog, just enter the following URL to your browser:
Be sure to change “yourdomain.com” to whatever your domain name is that you selected for your blog.
Now just simply enter your username and password that you set earlier and click on. You should now be redirected to the Dashboard where you can set up your WordPress blog, customize it to whatever you want, and write your first blog post. There are many free themes to customize the look and feel of your blog, but you can also buy a theme which will get you a more high quality look for your blog.
Congratulations, you’ve now set up your very own blog! What’s next? Here’s a few tips that can get you started on setting up your blog further.
As you see, it won’t take you more than 5 minutes to install WordPress and get your blog.
You should now be well on your way to building a successful blog. I hope this tutorial really helped you to set up your own blog. Please let me know if there’s any questions below! If you find this WordPress blog installation useful, then don’t forget to share it on Google plus and Facebook.